
A fast primer on installing, creating, running, and importing Browser Sequences.
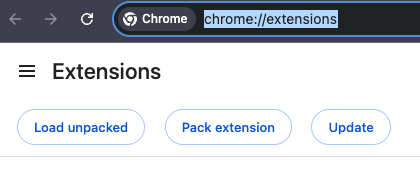
chrome://extensions/.
Once installed and connected, Browser Sequences run directly inside your Chrome browser. When you start a sequence, the plugin typically opens a new browser window (unless configured otherwise) and begins carrying out each step automatically—clicking, typing, waiting, or extracting data.
As the automation runs, you may see the browser visibly progress through steps (navigating between pages, filling forms, clicking buttons). The sequence continues until it reaches the end of the workflow.
Tools interact with live pages, so failures can occur if a site changes
(layout/selectors), if you’re not logged in, or if captchas/consents
appear. In those cases, re-record or edit the failing step (or add a
wait_for step) and try again.
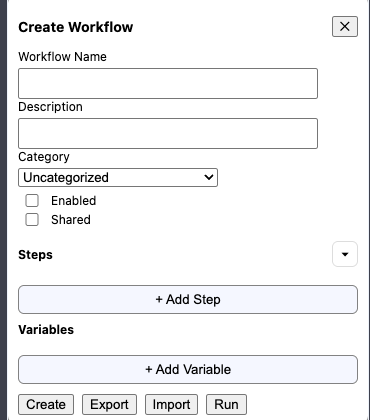
Open the plugin’s sidepanel and click Create Workflow. Add steps such as “open page,” “click element,” “type text,” “wait,” and “extract data.” Each step defines how the browser should act.
You can press Run while building—before saving—to verify that your steps behave as expected. This short feedback loop helps catch selector and timing issues early.
Tip: right-click the element you want to automate and copy its CSS selector or class. Stable, specific selectors make your automations more reliable on changing pages.
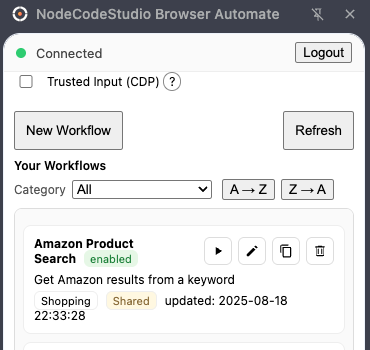
Note: a sequence will not appear in your MCP tool list until it is saved and enabled.
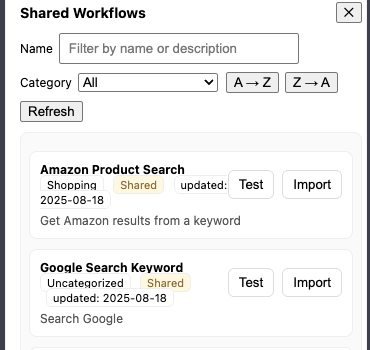
Visit the Shared Sequences page to browse a library of pre-built automations covering common use cases. These are tested to work in most environments.
Click Import to copy a sequence into your account. You can import the same template multiple times for different variants.
After importing, edit steps, selectors, or wait conditions to tailor the workflow to your exact needs—think of them as starting templates, not fixed scripts.
wait_for steps (network idle / element visible) before extracting.